|
Getting your Trinity Audio player ready...
|

What is UI Automation?
UI Automation is used to convert the UI test cases to automated test cases to some extent.
Looking into this phrase(“to extent”), you may think “Why to some extent, and why not 100%? “
We use most popular UI automation tools like Selenium, UFT, Coded UI, Sahi, etc., . Each and every tool has it’s own limitation on automation coverage.
Let’s say “seeking the running point in a YouTube video.” . It is not possible in with “UI” automation tools. Because it will vary based on the tool and its subscription purchase.
Choose the best automation tool based on challenging scope !


Let’s come to our cup of tea! “cup of tea? — Yes. I said about our topic. It is about achieving End to End Automation in IoT-based applications”
Smart Home:
Let’s take an example of a “Smart Home”.
What is a Smart Home application?
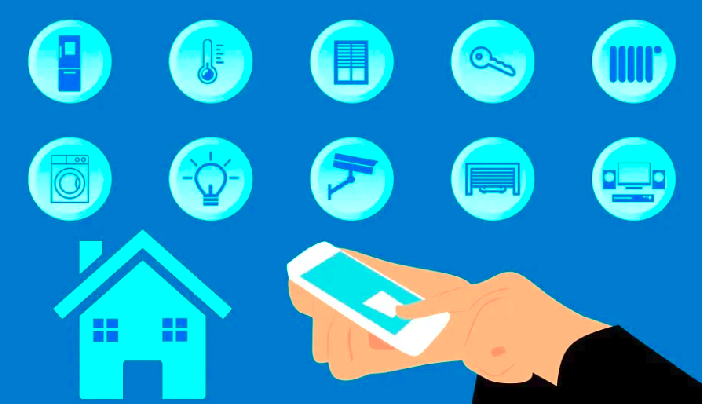
Actually, Smart Home is a platform that automated homes with smart IoT devices as shown in the above picture. It allows users to access devices remotely in their day-to-day life. Activities like Door(open/close), setting code for lock, Controlling the HVAC system, controlling lights and switches, and a lot more are essential…
Ok… This is going to be our agenda. Let’s see how we can automate the above smart home application.
As our test cases and use cases revolve around IoT (Gateway(It will control all devices) and devices(like Lock, Lights, switches, etc.)), so automating UI alone may help us up to a certain extent.
Great! To ensure no defect in our smart home product, we must look at every nook and cranny. Thanks to the robot framework end-to-end automation because it pave the way to extend our test coverage.
Why Robot framework? What does it entail?
In end-to-end automation testing, we expect the entire system to be tested from start of use case to end of it, to ensure that the application flows smoothly. System dependencies will include the device dependencies to ensure that all integrated components work together as expected.
Let’s take one simple use case in the smart home application !
Switch-on the Smart Light

1) Login to the Smart home application.
2) Select the House which has Smart light.
3) Switch on the smart light from the smart home mobile app.

4) Verify the switch is really ‘ON’ on the actual Smart light device.

5) Verify the ‘Switch ON’ status is updated in the Smart homes application.
6) Verify the ‘Switch ON’ status is reflected on the Smart home app.

Above test case has both UI and Device validation flows, let’s see how we can handle.
Step 1, 2, 3, 5 and 6 can be automated through UI automation. But Step 4 can’t. And here comes the usage of robot framework through which step 4 can be verified by connecting to the MQTT library. In the above scenario, the gateway supports MQTT communication, so we are using it. It may differ depending on the IoT gateway and cloud. Therefore,it bridges the gap between the UI and IoT device response validation.
And now ,You may have this question in the mind. “Why do we need to verify Step 4 on the device side?“
Because let’s say a user is away from his Smart home and he/she wants to switch on/off lights from a remote place. In this situation, he/she wants to know the real time update ,whether the light is really switched on or not, it is a demand (expectation from the product).
In spite of clarity, without getting the response from the device. The server reports ON in UI .Even after the device responds to server as failed but in the UI it is displayed as ON. Both are considered as failure test cases hence end to end automation serves an important purpose.
Installation :
- To execute the robot framework test cases in linux system. We should have installed python and related packages in the linux system.
sudo apt-get install python3
sudo apt-get install python3-pip
2. Use the below command to install the robot framework and selenium.
pip install robotframework
pip install robotframework-seleniumlibrary
pip install selenium
3. Below command will install the required libraries such as MQTT and API.
pip3 install robotframework-mqttlibrary
pip3 install robotframework-requests
It doesn’t limit us with the above-mentioned libraries. It allows to install several libraries like Appium, Rest instance, and Database libraries. etc.
First Test case:
The robot framework test case can contain three parts. They are
1. Settings
2. Variables
3. Test cases
Settings

In the Settings tab, we can import the required built-in libraries, user-defined libraries, and files or packages to execute the test case. Those files are
- Variables file: This file consists of all global variables that are used across the framework.
- Locators file: This file consists of locators which are used to find the web element.
- Keywords file: This file consists of all reusable methods that can reduce repetitive effort.

Variables:
In the variables section, we can declare the variables that can be used in that particular test suite.

Test case:
The “Test Cases” tab, will have our actual test case(s).
We can add tag and documentation to the test cases. It will improve framework maintenance.

Architecture of the framework:

Device communication:

MQTT is an OASIS standard messaging protocol used for IoT devices,which can provide real-time and reliable messaging service , with very little code and bandwidth. In the MQTT protocol, the subscriber and publisher communicate through the MQTT broker.
Let’s take an example. An MQTT client (server) wants to know the temperature of the room. The client subscribes to the topic (temperature). The room temperature sensor publishes the room temperature to the topic ‘temperature’. The communication between the publisher (sensor) and the subscriber (server) happens through the MQTT broker.
Similarly, we subscribe to the topic of the Devices and get the message through the MQTT broker.
Connecting to MQTT:
To make use of the MQTT, we have installed python and ‘paho-mqtt’ using pip(package installer for Python). We have to decide on the port, topic, and MQTT broker.

Connect to MQTT:
We are creating an MQTT client and connecting the client to the MQTT broker.

Subscribe to the topic:
We subscribe to the topic of the specified gateway and receive the message on that topic.

Publish the topic:
we can publish a message to the specified gateway.

Test Execution:
We can execute our test cases in several ways.
- The execution command should start with the text “robot” and the file containing the test case. The test case file should have an extension as “.robot”.
robot <filename.robot>- Executing the particular test case alone in the robot file.
robot -t <testcase_name> <filename.robot>- Executing the test case with tags that are mentioned in the test cases.
robot --i <tagname> <filename.robot> or <test_suite_name>- We can store the result in a required folder by executing the command
robot -d <dest_path> <filename.robot>Report:
Report Structure:

Detailed Log of test case:

Benefits of Robot framework:
To conclude with, here are few benefits of robot framework.
- It has good support for external libraries like Mqtt, Api, requests, etc.
- Easy Syntax.
- Easy to implement.
- Detailed logs.
- User friendly.
Happy Testing!
Reference:
To learn more about Quality Engineering topics visit – https://engineering.rently.com/quality-engineering/
Get to know about Rently at https://use.rently.com/

Manojkumar S
Associate Quality Engineer

Bharani Kumar S
Associate Quality Engineer

Sanjana Ramanujam
Associate Quality Engineer

Boobalakumaran S M
Senior Quality Engineer

Priyadharshini V
Associate Quality Engineer

Mohamed Azarudin
Senior Quality Engineer

Vignesh Jayaraj
Quality Engineering Lead
Good information, I am using assure cloud is it possible to connect device in this case ?
Explanation about IOT smart home domain is also good!
Hi
Yes, we can able to do this for the Azure Cloud. The implementation is not specific about AWS or Azure, this is about MQTT Channel. So Where ever MQTT Channel is used for Communication with IoT devices, it is applicable.
For your Reference: https://learn.microsoft.com/en-us/azure/iot/iot-mqtt-connect-to-iot-hub